

How To Fix The Brush Tool On Photoshop
Get more from custom Photoshop brushes
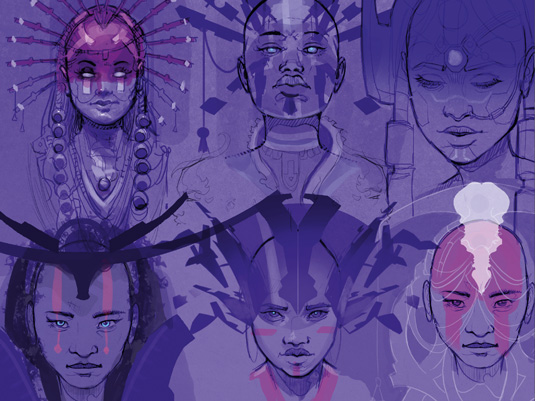
There are thousands of Photoshop brushes (opens in new tab) online to help you add beautiful artwork to your creative resumes (opens in new tab) or other projects. The things that tin be done with your brushes inside Photoshop'due south Natural Brush Media window are almost endless! It's amazing how you can manipulate your brush to create patterns, textures, hair, skin, that painterly feel, happy accidents and so on.
If my work consignment requires a realistic finish, I endeavor to avoid using photograph references. That way, I'm free to create and use suitable brushes on the fly. And of course, it's fun using new custom brushes! I've supplied 65 of my own with this workshop, for you to endeavor out.
Download your resources:
- Download assets
- Download video
01. Do some research
Before I start painting I like to explore and sketch around my subject to get the ideas flowing. Sometimes I practice this using pen on paper, sometimes directly in Photoshop CC (opens in new tab) using a basic hard circular castor with both Opacity and Flow set to 80 per cent. I eventually develop a clearer thought of what I want to pigment.
02. Create a black and white base
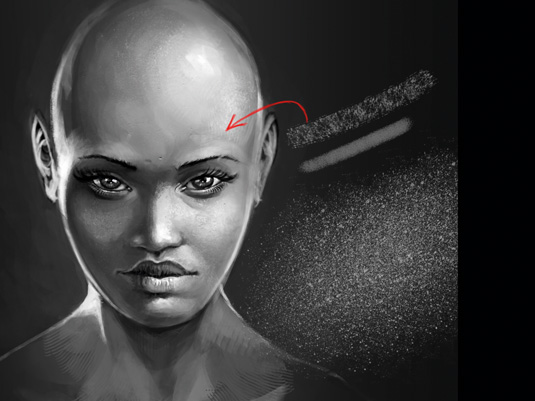
Painting in black and white gives me amend control over my values. Information technology also enables me to concentrate on the shapes, low-cal and shadows. For the skin I use my first custom castor: the mighty Spickel castor.
I use it to create pare texture on areas such as the nose, cheeks and chin. I work on a split up layer and use effects such as Drop Shadow or Bevel and Emboss.
03. Introduce colours on different layers
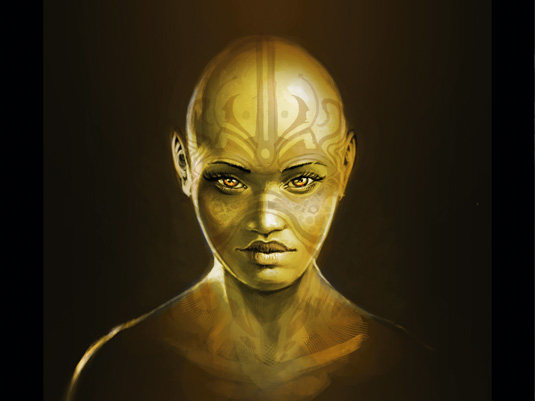
Once I'k happy with my values, I start applying colours on layers set to Overlay, Multiply, Color Dodge, Darken, and so on. I effort to vary my colours and option new ones several times in the Color window. Because my graphic symbol has xanthous skin, I employ greens, browns, oranges, yellows and fifty-fifty some cyan.
Then I driblet my layers and keep on painting usually. Finally I draw some tattoo-like shapes on one side of her face, before flipping them to the other side. I consider turning these tattoos into custom brushes for later use.
04. Paint with blueprint brushes
I innovate a few designs using some custom pattern brushes. I create i past taking a graphic, transforming it into a brush and so playing around with the settings within the natural Castor media window (Brush tip shape > Spacing and Shape dynamics > Angle Jitter set to Direction).
Such brushes are platonic for creating clothing patterns, tattoos and scales, for example.
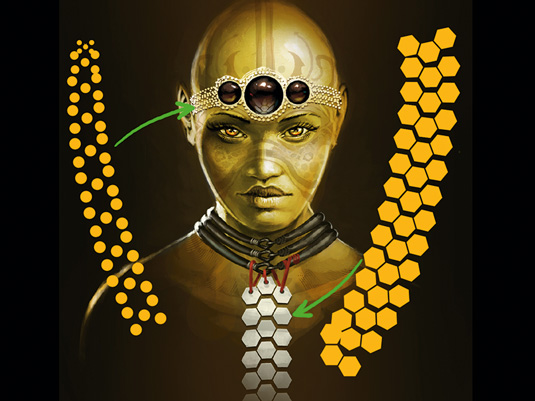
05. Apply the Hexagon brush
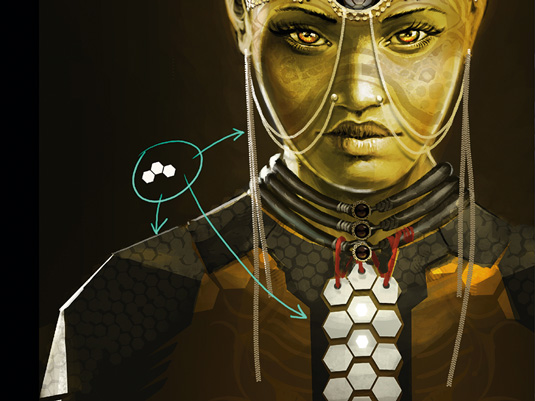
I utilise my unproblematic custom Hexagon brush in three distinct areas for 3 different effects. Get-go to create a chest plate, then to make some facial chains and finally to introduce some futuristic-looking texture on her chest and shoulder armour.
Using the castor on unlike layers enables me to create a mask of my patterns, so I tin can paint within them to depict clay or worn edges.
06. Use what you've already got
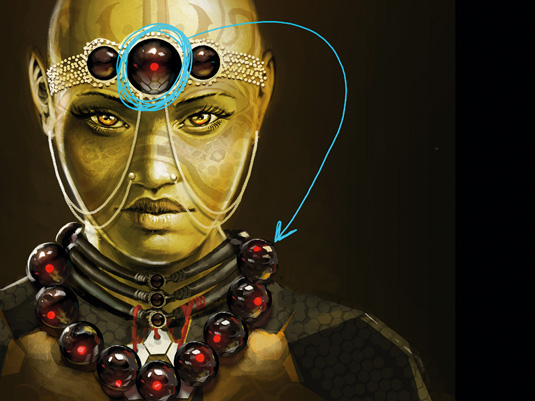
Reusing elements that you've already painted will save you time. Hither I take the rock from the effigy'south forehead to create a flying spy-bot neckband (of grade!).
I select the stone using the Lasso tool and then re-create-paste it on to its own layer using shift+ctrl+C and shift+ctrl+5. I repaint the highlights and shadows past hand to avoid the copy-pasted feel.
07. Build upwardly the collars
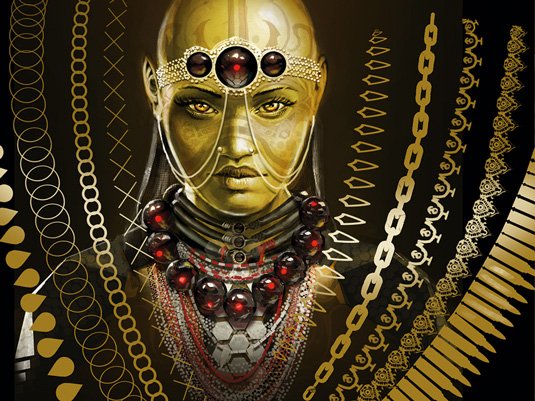
I use several design brushes to create the illusion that my character is wearing a lot of collars around her neck. These brushes are so easy to create and will relieve you a lot of fourth dimension.
I used them when working on Assassin's Creed iii and Unity to make most of the patterns on the many costumes, such equally the yellowish embroidery on Louis Sixteen'due south ornate outfit.
08. Attempt out a Rorschach Techno castor
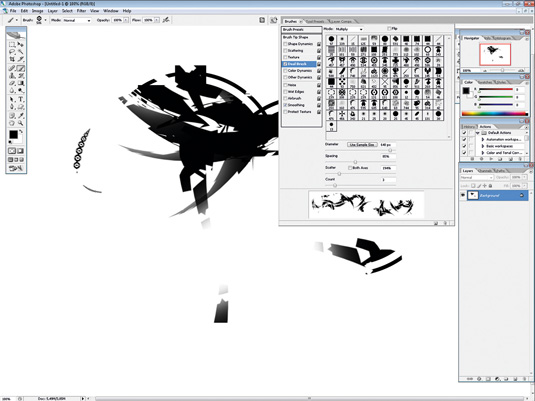
My happy blow Rorschach brushes tin can exist tricky to create and calibrate, but they're simply amazingly fun! Create a technical-looking shape and transform information technology into a brush. Then in the Natural Media brush window put it on Dual Brush with another graphic-shaped castor and play around with the different sliders to get random shapes popping out of your brush.
Next page: More tips for making the best utilize of custom brushes

Thank you for reading 5 articles this month* Bring together at present for unlimited access
Enjoy your kickoff month for just £ane / $i / €1
*Read v complimentary articles per month without a subscription
Bring together now for unlimited access
Endeavour first month for just £1 / $i / €1
Related articles

How To Fix The Brush Tool On Photoshop,
Source: https://www.creativebloq.com/digital-art/get-more-custom-photoshop-brushes-21619415
Posted by: stewartafre1969.blogspot.com
0 Response to "How To Fix The Brush Tool On Photoshop"
Post a Comment